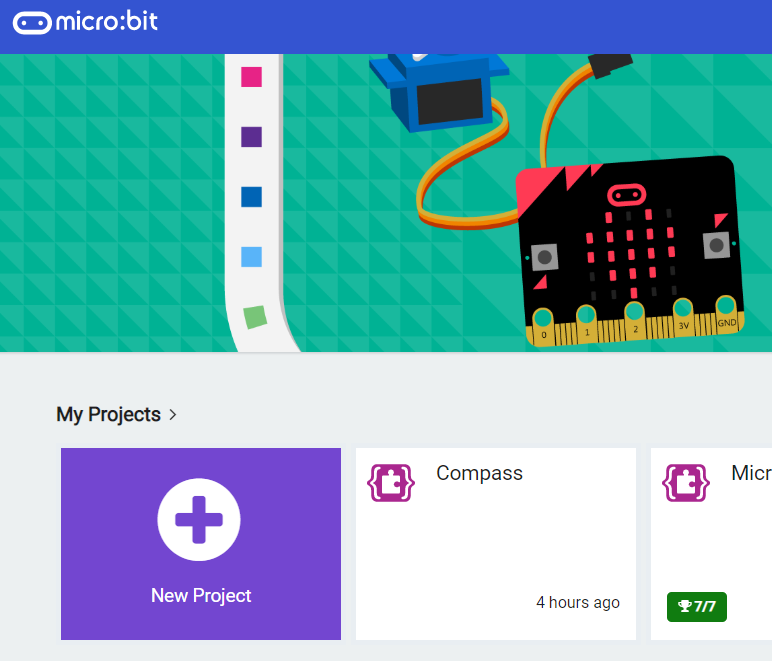
1 - Create a new Microbit project.
The Kitronik Soil Moisture Kit is a sensor board that can be once you connect it to your Microbit, it can monitor the moisture present in the soil. The two conductive tines are placed into the soil. Any water or moisture in the soil will conduct to give an analogue voltage that can be read by the Microbit.
After you connected the Soil Moisture Kit to your Microbit, create a new Microbit project.
Go to the Makecode.com Microbit website using the link below and click on the 'New Project' button underneath the 'My Projects' heading.
https://makecode.microbit.org/
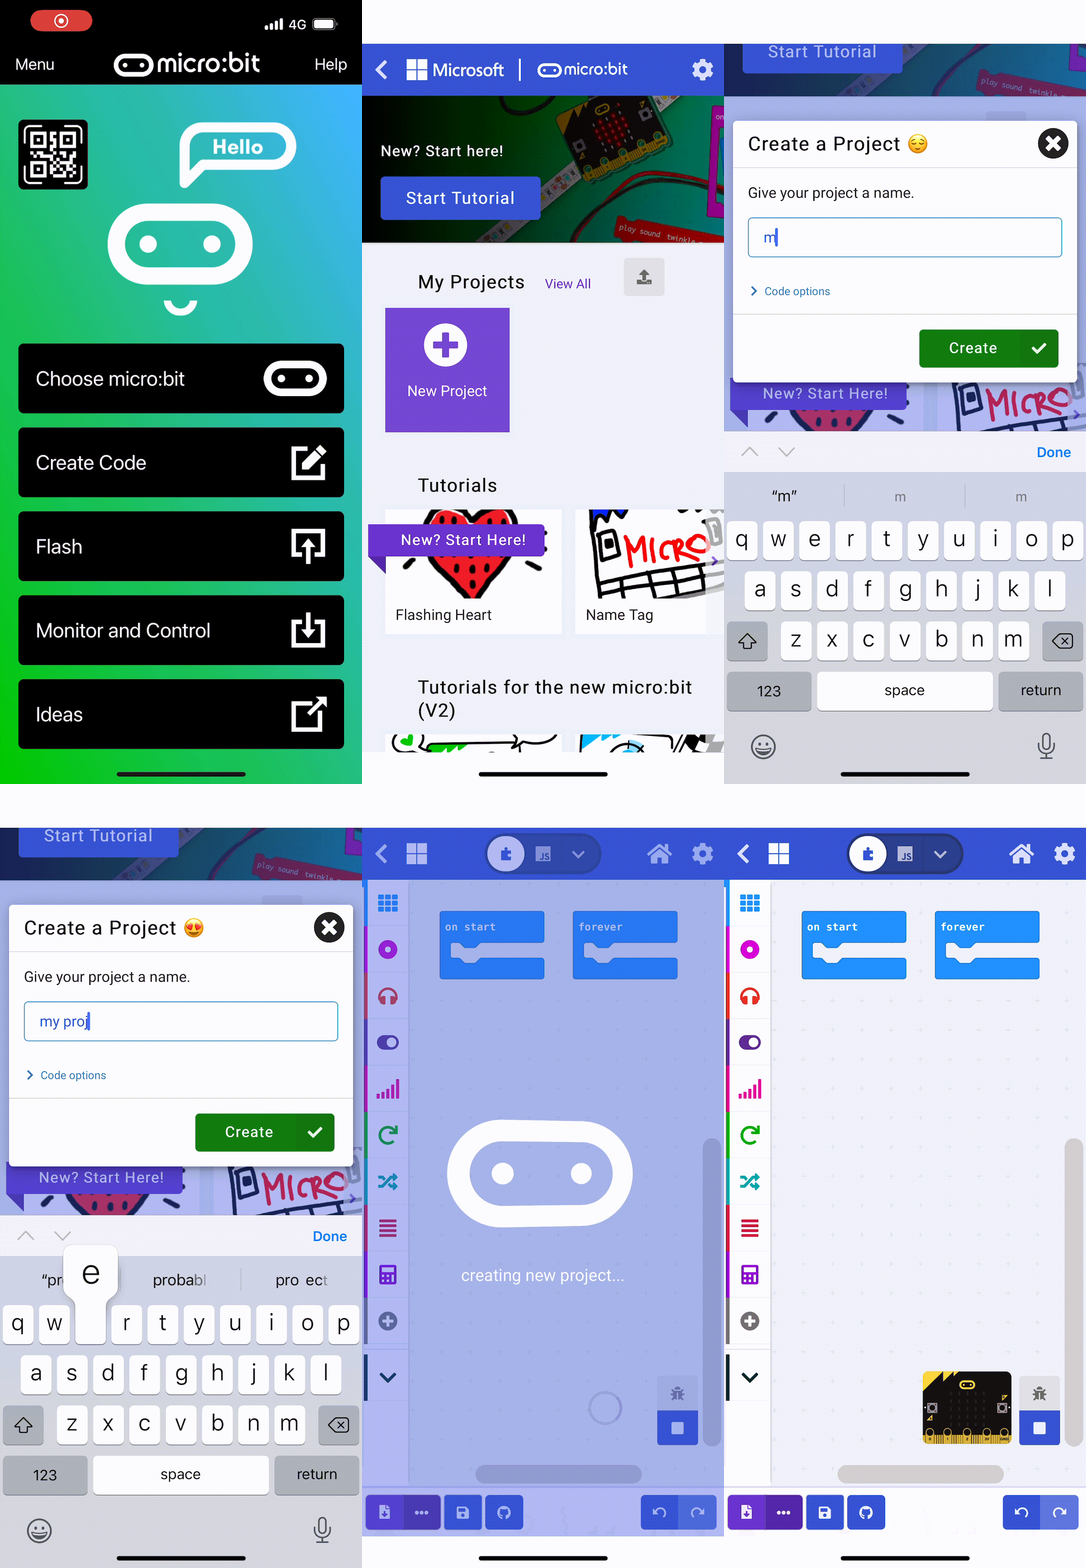
Install the micro:bit app on your iPad or tablet.
Open the app, tap 'Create code' and then create a new project.

2 - Create a variable called 'moisture'
We will need a variable to store the current level of moisture that is in the soil.
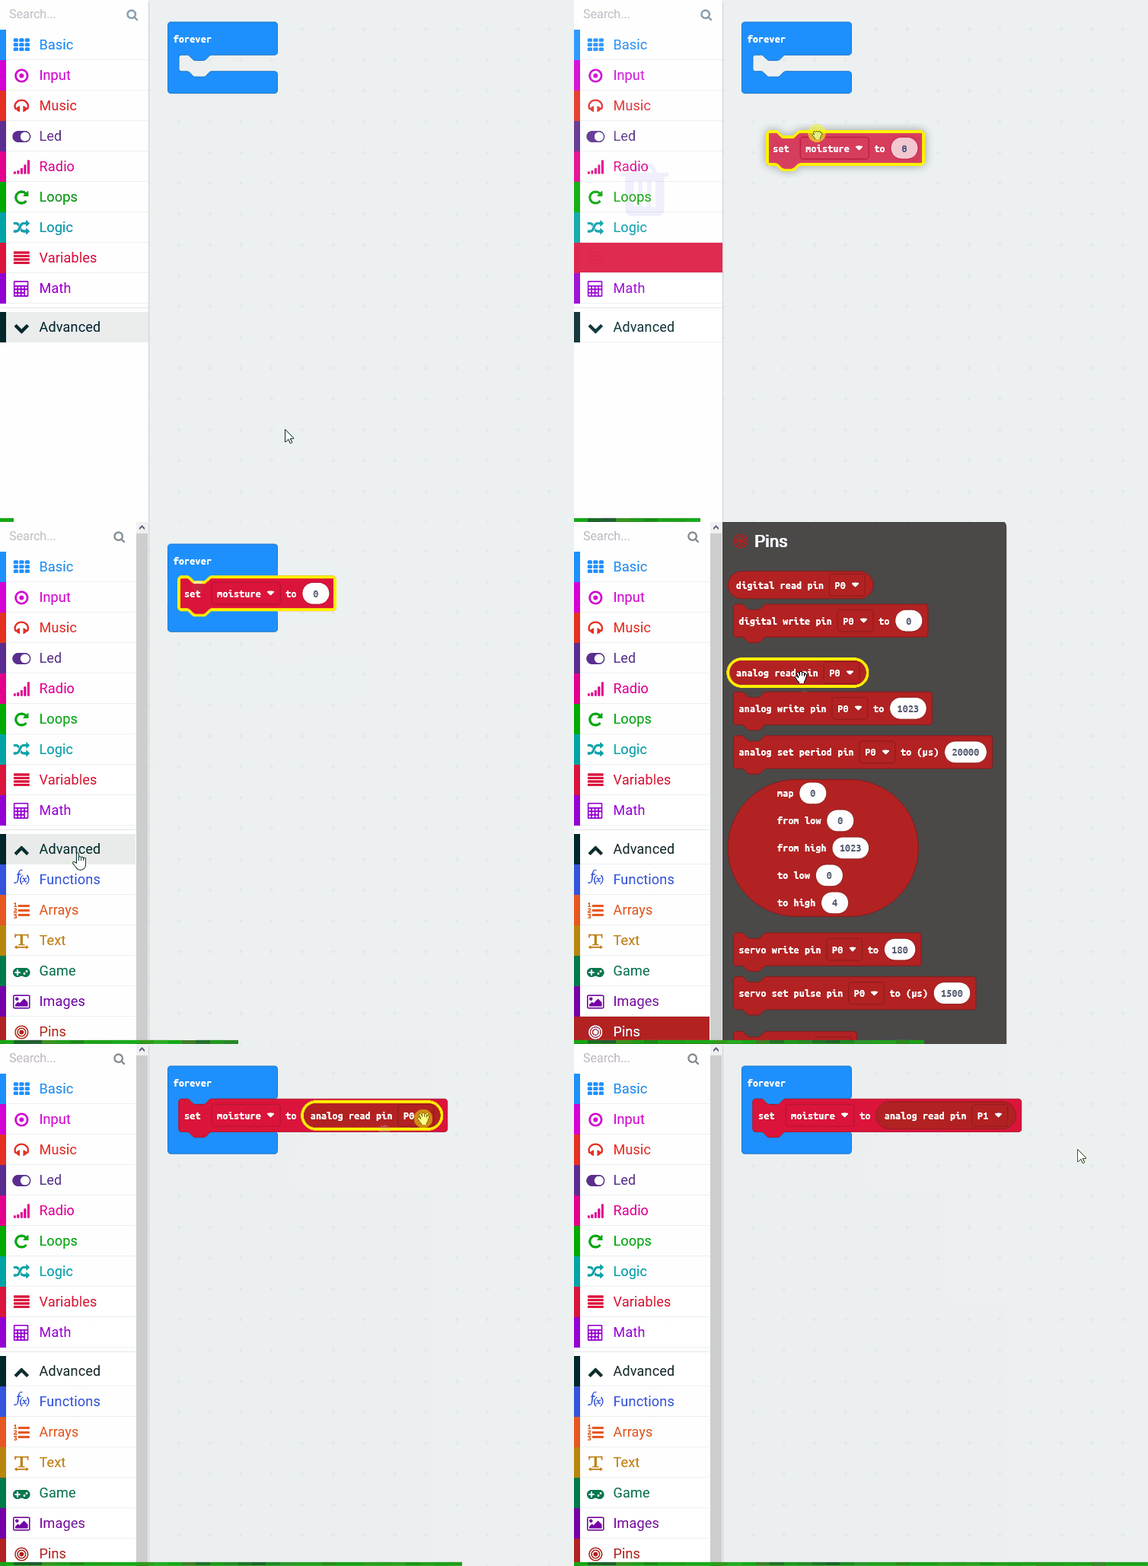
Create a variable called 'moisture' and then add the following code to get the moisture reading from the Soil Moisture Kit and store it in the variable.
let moisture = 0
basic.forever(function () {
    moisture = pins.analogReadPin(AnalogPin.P1)
})
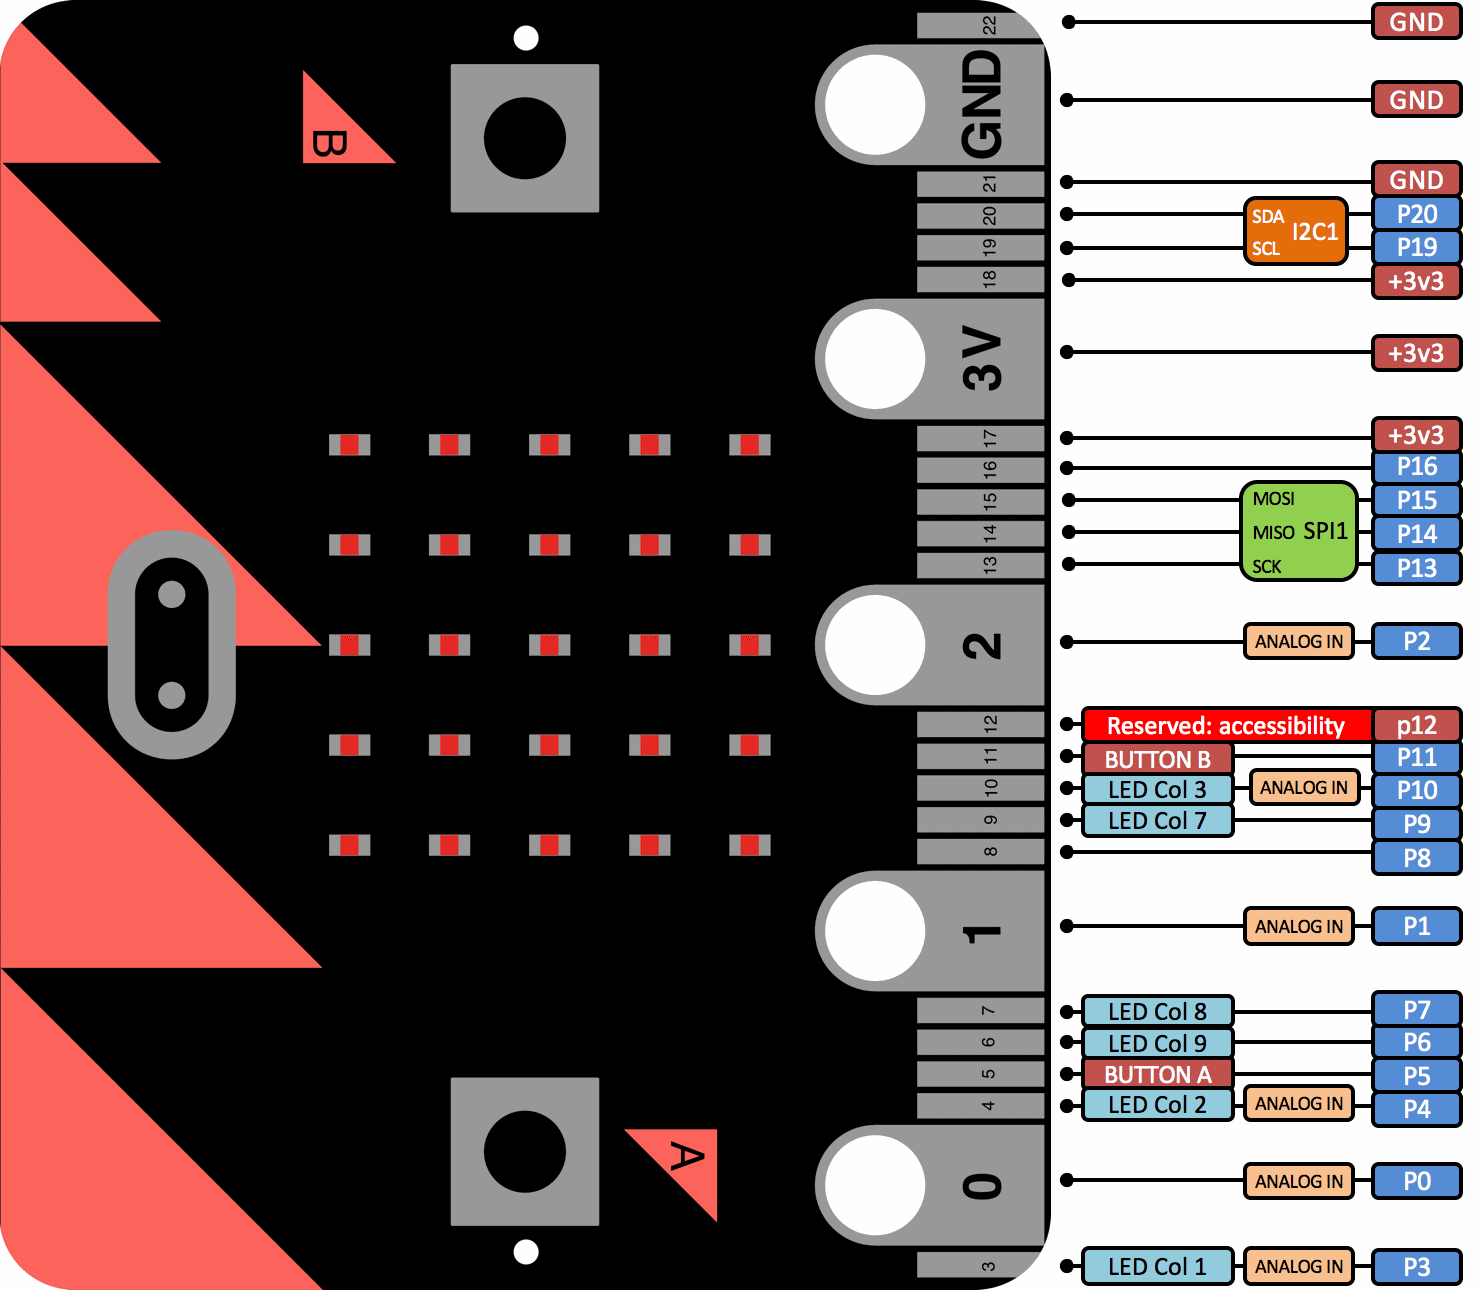
The micro:bit has 25 external connections on the edge connector of the board, which we refer to as ‘pins’. The edge connector is the grey area on the right side of the image.
There are five large pins, that are also connected to holes in the board labelled: 0, 1, 2, 3V, and GND. And along the same edge, there are 20 small pins that you can use when plugging the micro:bit into an edge connector.
Large pins
You can easily attach crocodile clips or 4mm banana plugs to the five large pins.
The first three, labelled 0, 1 and 2 are flexible and can be used for many different things - which means they are often called ‘general purpose input and output’ (shortened to GPIO). These three pins also have the ability to read analogue voltages using something called an analogue-to-digital converter (ADC). They all have the same function:
- 0: GPIO (general purpose digital input and output) with analogue to digital convertor (ADC).
- 1: GPIO with ADC
- 2: GPIO with ADC
The other two large pins (3V and GND) are very different!
- 3V: 3 volt power output or power input. (1) power output: If the micro:bit is powered by USB or a battery, then you can use the 3V pin as a power output to power peripherals with; (2) power input: If the micro:bit is not being powered by USB or battery, you can use the 3V pin as a power input to power the micro:bit
- GND: attaches to ground in order to complete a circuit (required when using the 3V pin)
If you hold the ‘GND’ pin with one hand, you can program the microbit to detect yourself touching the 0,1 or 2 pins with your other hand, giving you three more buttons to experiment with (you just used your body to complete an electrical circuit).
Small pins
There are 20 small pins numbered sequentially from 3-22 (these pins are not labeled on the micro:bit, however, they are labelled in the picture below).
3 - Check the moisture
If the moisture is less than 400 then the soil is too dry and needs to be watered. Otherwise, if it is greater than 400, there is enough moisture in the soil for the plant to it does not need to be watered yet!
Add the following code to check the moisture level and show a happy or sad face.
let moisture = 0
basic.forever(function () {
    moisture = pins.analogReadPin(AnalogPin.P1)
    if (moisture <= 400) {
        basic.showIcon(IconNames.Sad)
    } else {
        basic.showIcon(IconNames.Happy)
    }
})
4 - Put in a pause
To ensure that the moisture sensor has a long and fulfilling life, it is better to write your code to perform a moisture check every so often rather than continuously. When the check is performed continuously it promotes rapid erosion of the electrodes on the prongs.
Add a pause (ms) 5000 block after the if then block so that you only check the moisture reading every 5 seconds
let moisture = 0
basic.forever(function () {
    moisture = pins.analogReadPin(AnalogPin.P1)
    if (moisture <= 400) {
        basic.showIcon(IconNames.Sad)
    } else {
        basic.showIcon(IconNames.Happy)
    }
    basic.pause(5000)
})
5 - Try it out with a plant!
That's all the code so you can put it onto your Microbit now and try it out in with a plant in your house or school!
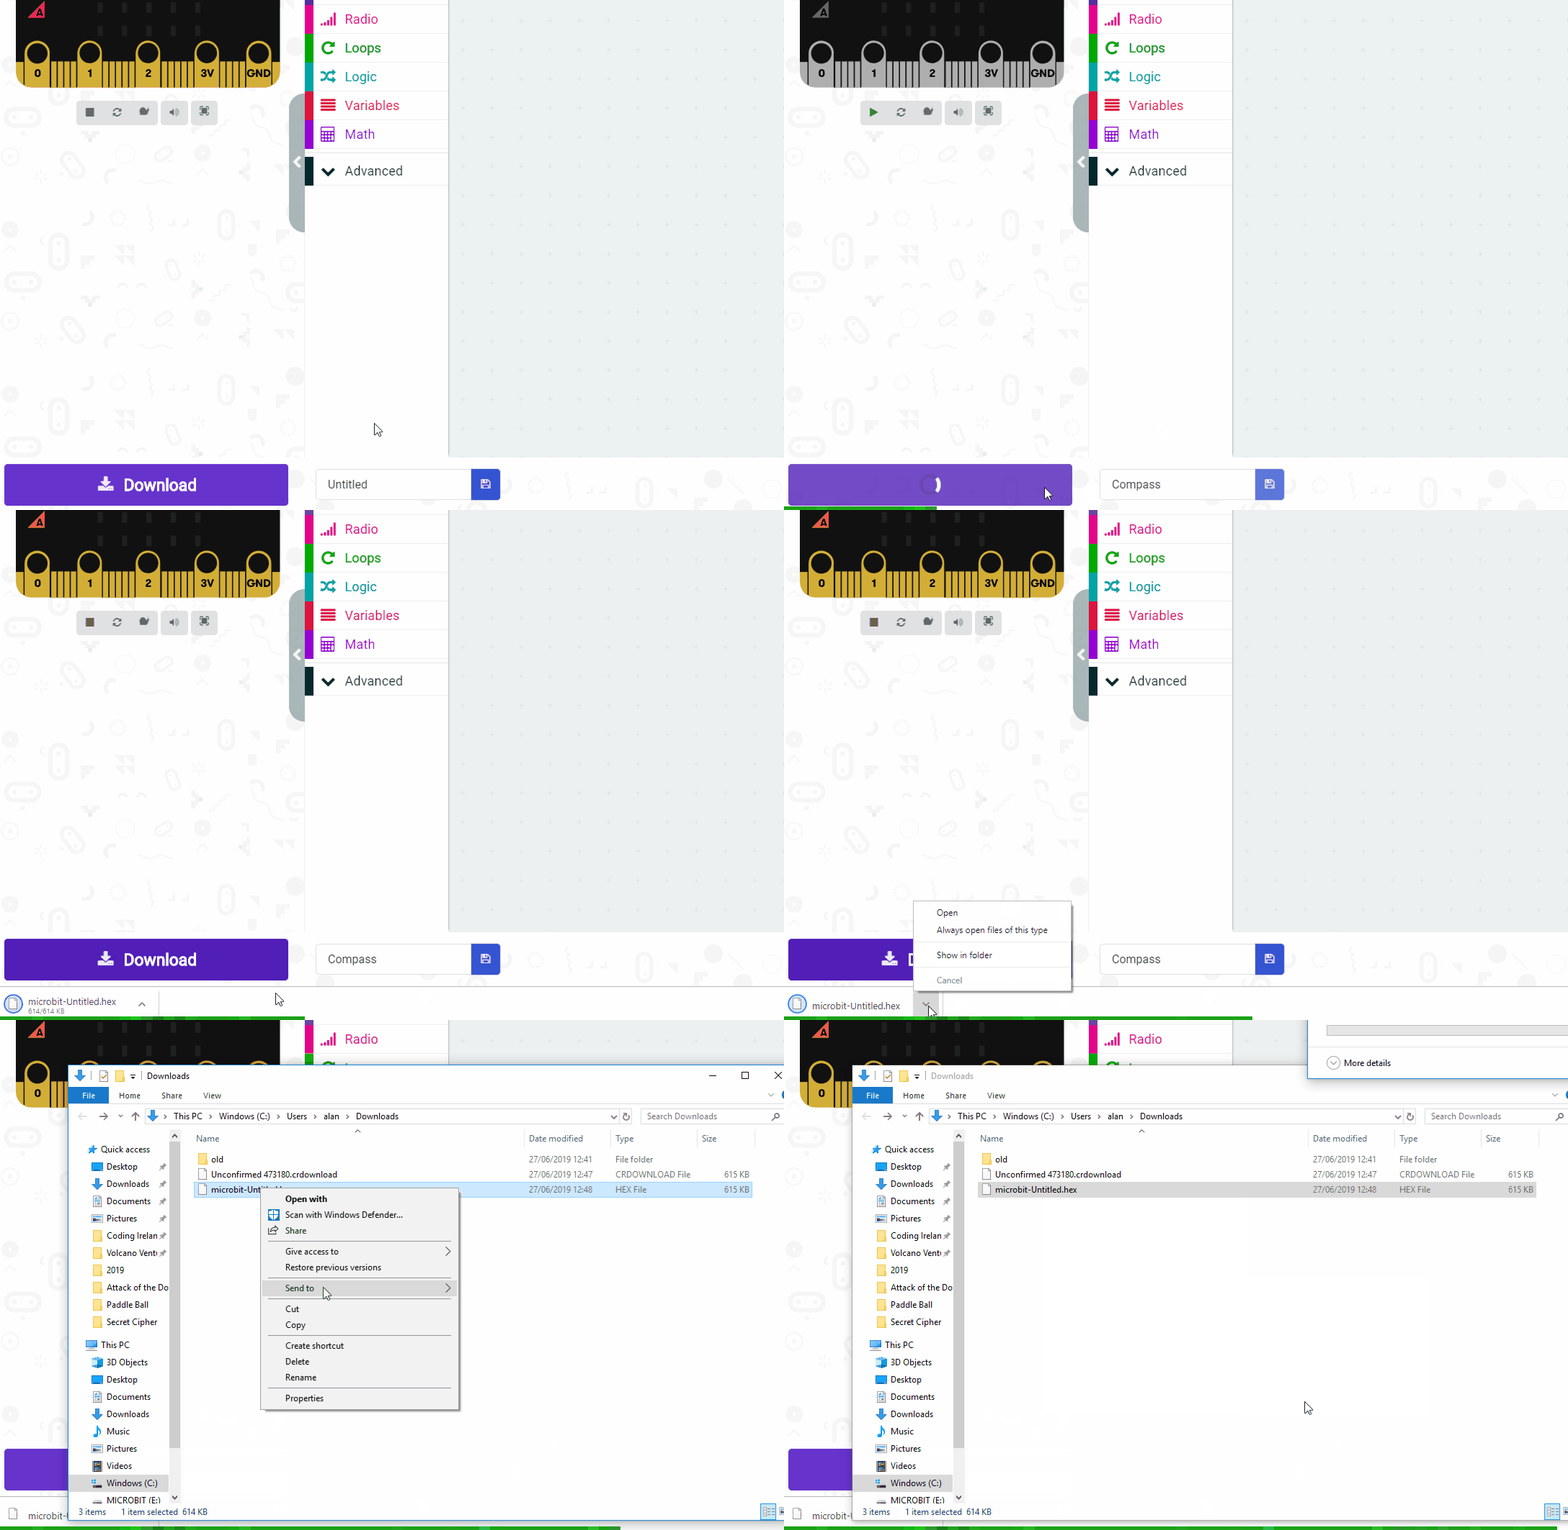
Give your project a name and send it to your Microbit by following these steps:
- Type "your project name" into the Project Name box.
- Connect your Microbit to your computer using the USB cable.
- Click the 'Download' button (a file called 'microbit-project-name.hex' will be downloaded to your computer).
- Open the folder on your computer where the file downloaded to.
- Right click on the file.
- Click Send To.
- Click Microbit.
- Power your microbit with a USB cable or battery pack
- Pair your microbit with your iPad/tablet (hold the A and B buttons and press and release the Reset button)
- Flash your project to your microbit

This lesson is copyright of . Unauthorised use, copying or distribution is not allowed.
