- 1 Complete Part 1
- 2 Add the score
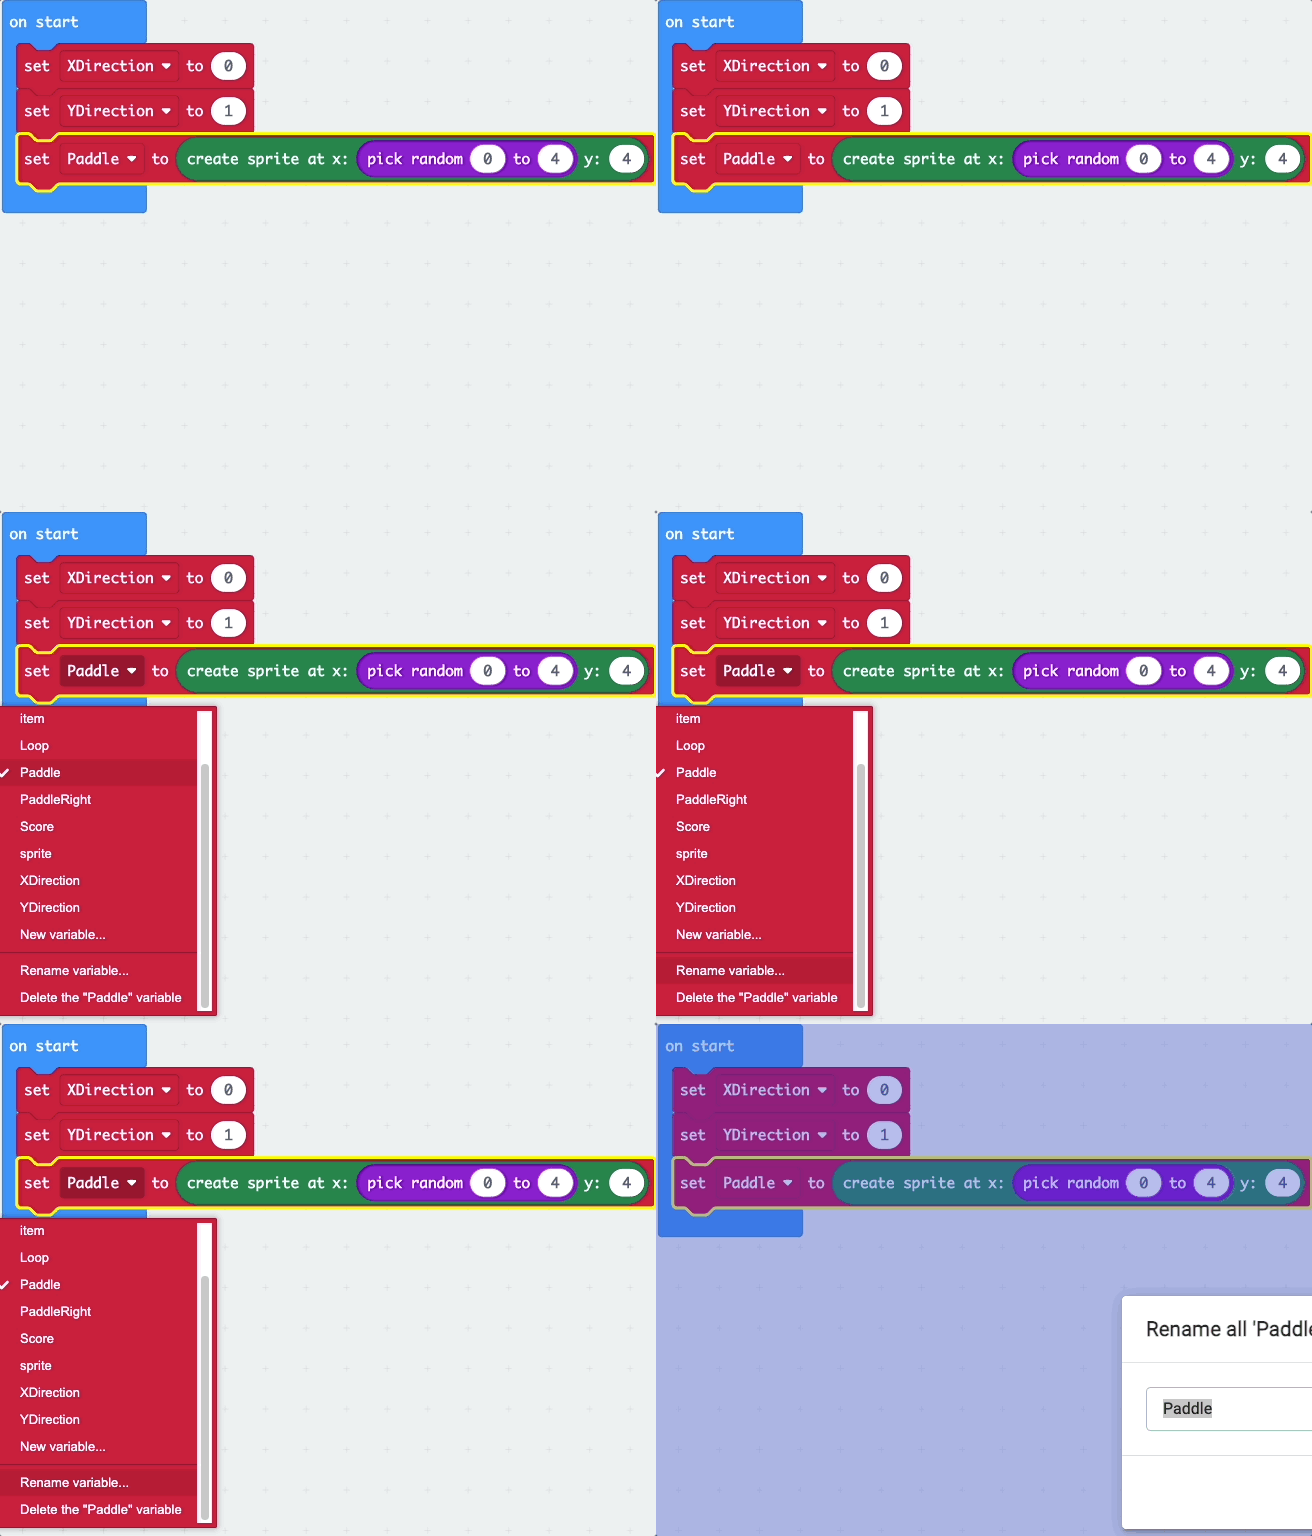
- 3 Rename 'Paddle' variable to 'PaddleLeft'
- 4 Create a sprite variable called 'PaddleRight'
- 5 Use the Paddle sprite variables to draw a bigger Paddle
- 6 Make the bigger Paddle move
- 7 Collision detection between the Ball and the larger Paddle
- 8 Download the code to your Microbit and play
Before continuing, make sure you have fully completed Microbit Pong Game - Part 1.
Open your code from Part 1 by clicking and dragging the file into the editor.
We're going to add a score to the game. Every time the Paddle bounces the Ball successfully we will increase the score by 1.
When it's game over, we should display the score.
Go to the block where you're setting the Paddle sprite variable (in 'On Start') and click the down arrow. You should see the option to 'Rename variable' near the bottom of the dropdown menu.

Now we will have two sprite variables for the Paddle (one for the left-side and one for the right-side).
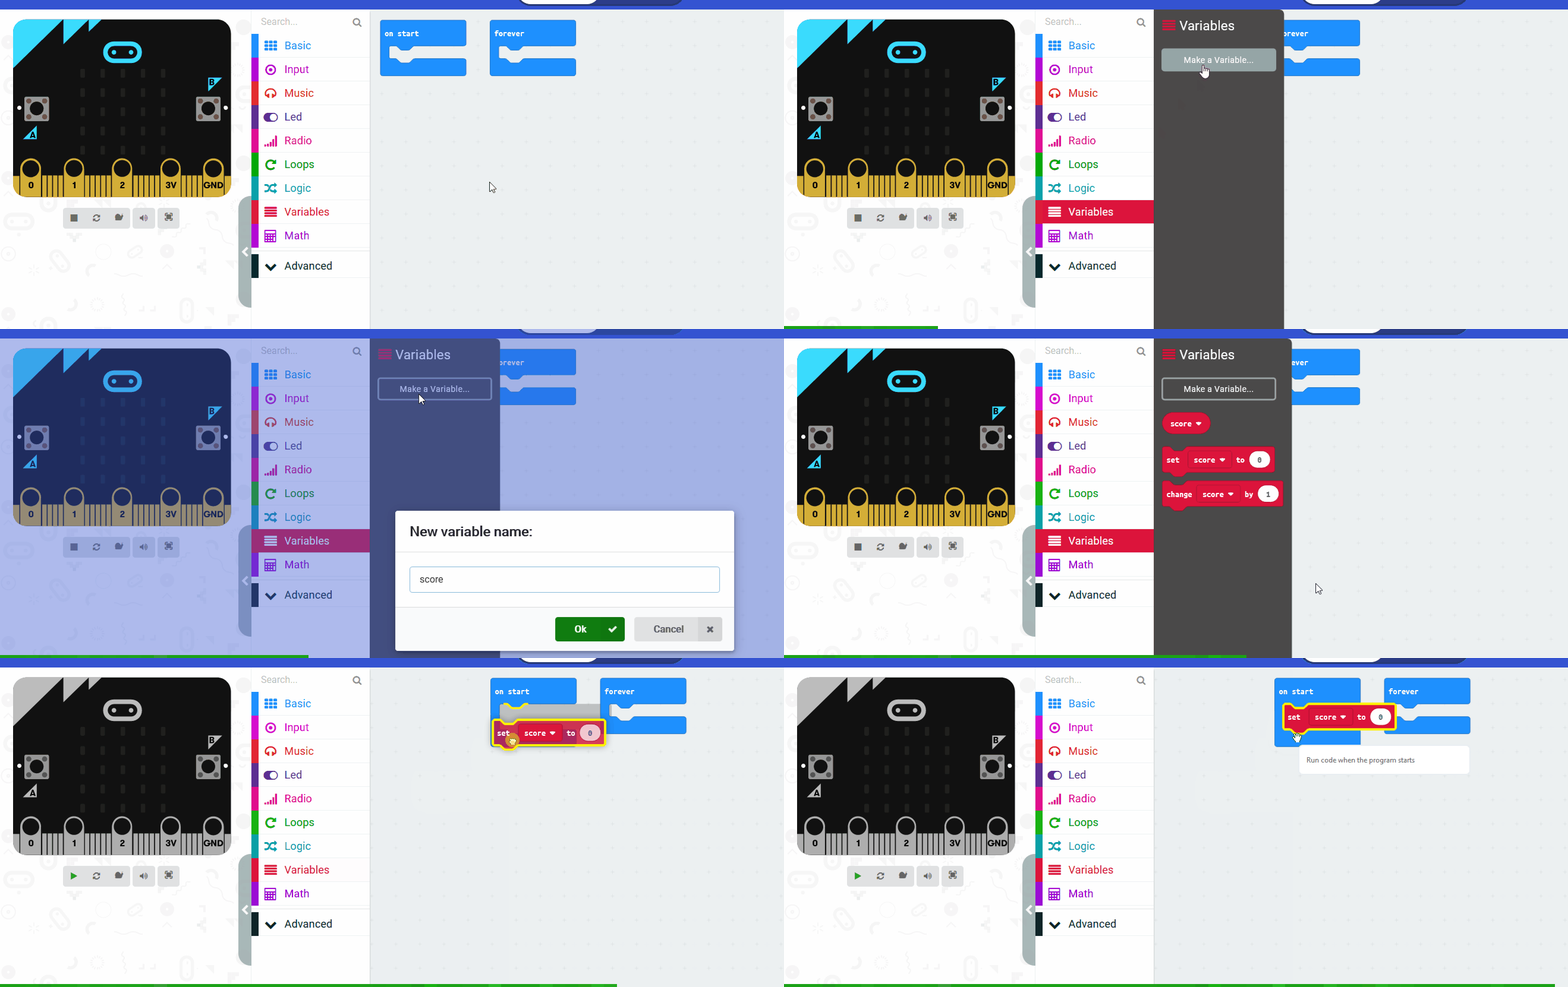
In the Variables toolbox, create a new variable by clicking the 'Make a Variable' button.
Once you click this button a box will appear asking what you want to call your variable. Give it a name that reminds you what you will be using it for. For example, if you wanted to keep track of your score in a game, you would create a variable called 'score'.

We're now going to use our new sprite variables to make the Paddle larger. So instead of the Paddle being one LED, it's now going to be two.
We'll start off by initializing our Paddle sprite variables.
let PaddleRight: game.LedSprite = null
let PaddleLeft: game.LedSprite = null
PaddleLeft = game.createSprite(randint(0, 3), 4)
PaddleRight = game.createSprite(PaddleLeft.get(LedSpriteProperty.X) + 1, 4)
We've changed the code where we were initializing the Paddle sprite variable before. So now, we're creating PaddleLeft within the first 4 LEDs at the bottom of the Microbit and PaddleRight will be offset by 1 LED to PaddleLeft.
This means that no matter where PaddleLeft is created, PaddleRight will always appear right beside it.

This lesson is copyright of . Unauthorised use, copying or distribution is not allowed.
